Lately I have been writing quite a bit about improvised heaters. After a bit of experimenting, the first thing I want to stress is that these heat sources are not going to replace your forced air furnace or even a good wood stove. They are something temporary to keep you alive until you can find a better solution. This morning I have been experiment with cardboard and wax stoves.
Now they are easy to make, but like anything else do it now before you need it. Simple as this stove sounds, there is a bit of a learning curve. The whole idea is that you take a tin can and fill it with rolled up cardboard and then fill with wax. You can use any size can depending on how big a fire you want and how much wax you have.
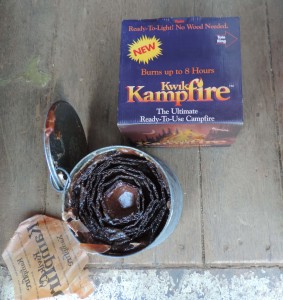
A company called Kwik Kampfire made some in the past that they claimed would burn for up to 8 hours. Now these were large about 8 inches in diameter and 6 or 7 inches tall. I have two of them that I got many years ago and have never tried. The one thing that I noticed about them was that they left the cardboard protruding well above the wax
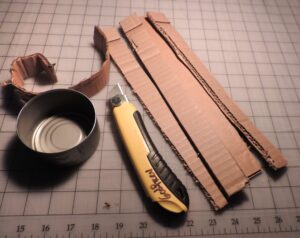
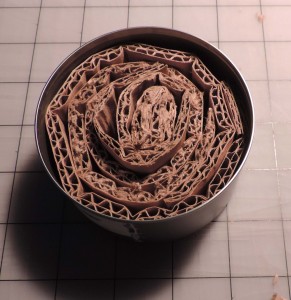
Anyway, back to my experiences with making one. My first advice is when melting the wax it is best to use a double boiler. But, don’t use your wife’s best pans, I found it a pain to clean the wax out after I made this mistake. Before I do it again, I am going to find old pans in a garage sale.
I used a tuna can and filled it up with rolled cardboard cut into strips. I then melted the wax and filled the can leaving only a small amount of the cardboard sticking out. A tuna can held just over a 1/3rd of a pound of wax.
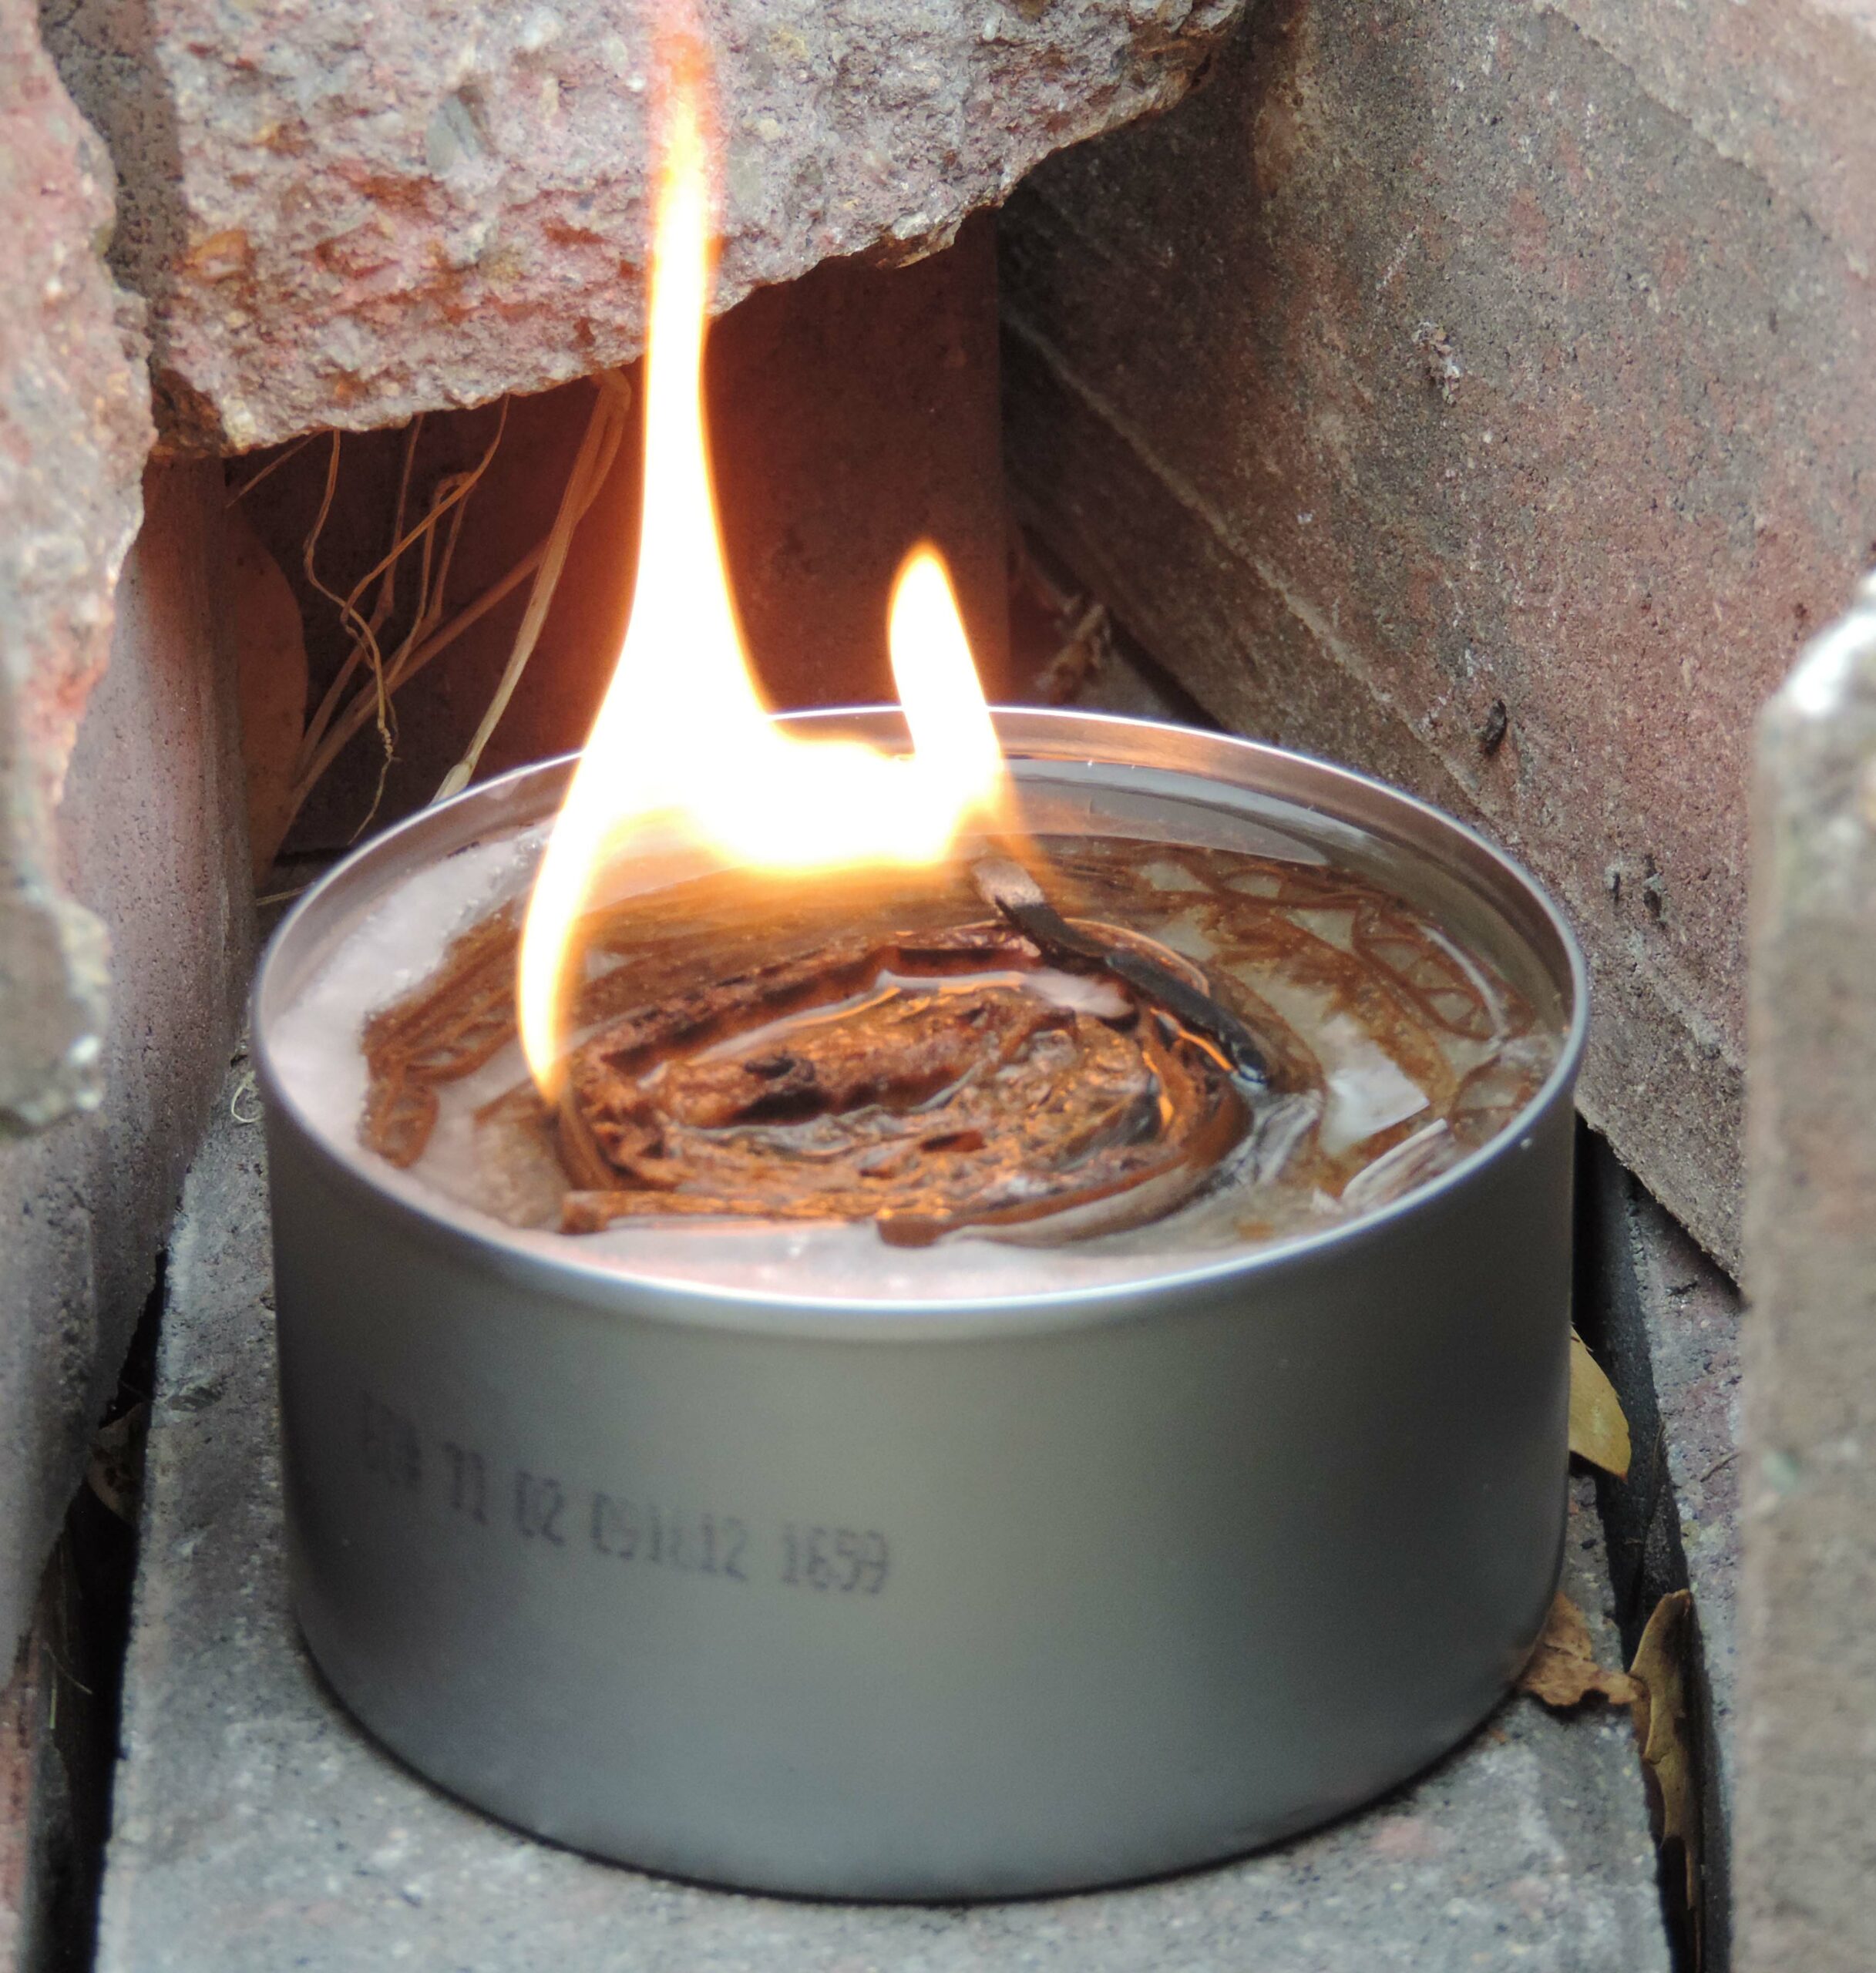
After it hardened, I took the cardboard and wax stove outside to light. It was a cool day here with wind. Lighting it was more of a challenge than I thought it was going to be. I used a couple of matches trying to get the cardboard that was barely sticking up to light with no success. Final I laid a match down on the top of the cardboard and it stayed lit. The match acted like a wick and as the wax melted, the cardboard finally caught fire.
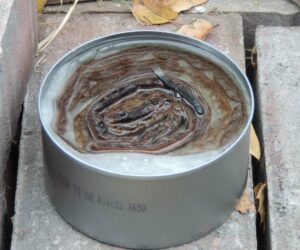
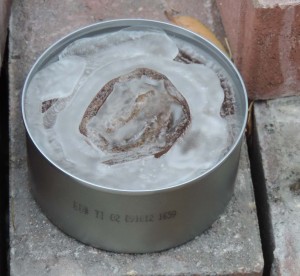
Because of the wind, I had to build a windbreak to get it to burn well. After about twenty minutes, I extinguished the fire by laying a brick across the top of the can. This is much better that blowing on it which may splatter the wax. The things I learned about cardboard and wax stoves are first leave the cardboard sticking up well above the wax so that it acts like a wick and the stove will be easier to light. Second, they have to be protected from wind and rain. Third, find something ahead of time that can be laid across the can to extinguish the fire. You never know when you may have to quickly hide the light.
These can be used to heat a small space or to cook your food. For those of you who are familiar with Sterno, they are very similar. Make a cardboard and wax stove and try it out yourself.

You can melt your wax (and wax scraps) in an old can set in a pot of boiling water instead of looking for a pan at a yard sale. You keep your can and add any candle scraps to it. The smaller size of a can will reduce the amount of wax wasted (left in the container you melted it in).
Thanks Rita
That is what my wife told me when she got home. Sometimes I do dumb things.
Howard
how about using METAL COFFEE CANS different sizes for cooking , or heating..? also for snuffing out the fire quickly use a LARGER COFFEE CAN over the smaller can to smother the fire rapidly & safely.
I bought a 6 cup pyrex measuring cup from a yard sale and I just melt my wax scraps in the microwave and pour
We made these Buddy Burners with our Girl Scout troop this past October. We used large coffee can/#10 cans as the cook surface. Cut open a slot about as wide as the tuna can on the open end and then punch holes around the closed end to allow air flow. Flip it upside down and slide the lit can under it. We used pans made of foil and the girls cooked ground beef in them. Make sure you have plenty of air flow or the burners will go out. Also have an uncut can to snuff out the cans, blowing them out scatters wax and dumping water on it causes the fire to flare up.
To melt the wax we used an old juice can as our double boiler and dumped old candles into it to melt. The biggest problem I ran into was trying having a large enough hot pad to pick up the can to pour the wax out and to keep from dripping the hot water on me. We determined you don’t want to pack the can with cardboard but you also don’t want too little in there and make the cardboard strips slightly taller then the height of the tuna can.
Thanks Jenn for the tip on how tall to make the cardboard, as well as how dense to pack it in.
To clean wax out of a pot – pour out all you can while liquid. Place in a warm oven to melt all bits and wipe with paper towels. Then some solvent like lamp oil can be used to clean out the rest…. dish soap and a good rinse and viola! You’re out of the dog house!
I’ve made small versions of these for fire starters, but I added matches to them, with the tops of the matches exposed. So, I can either light the matches or turn it upside down and strike the matches on a rock or something. I like the idea of using coffee cans for this too. Great idea.
Has anybody tried to wet the cardboard with some alcohol before pouring the wax in ? Or maybe some fat wood shavings so it might last longer ?
Alcohol would just evaporate, and probably not something you want to have around flame and hot wax. I put several cotton balls in the center for a “wick”, before the wax dries. Just push them down with a toothpick or cop-stick, but leafe some above cardboard and un-soaked.
I use a #10 can to boil the water and place a 1 lb. coffee can containing the wax inside the #10 water can to melt it. I use a pair of locking pliers to handle the can.
I use the same technique to melt and blend beeswax and tallow or lard to make bullet lubricant for my antique black powder rifles and revolvers. In black powder days the U.S. Army bullet lubricant was a blend of mutton tallow and beeswax. The Confederates used lard. I use equal parts by melted volume of Goya manteca from the grocery store and beeswax, which I buy in the crafts section at Walmart with the candle making stuff.
The point being that if you are short on wax, don’t be afraid to blend in fat, tallow, vegetable oil or even used motor oil, if its all you have. Scraps of old broken shoelaces, cotton clothesline or webbing from old pack straps can be added as wicking material.
Think about what materials you have. Waste nothing.
Cooking on used motor oil is a concept I have never considered. It’s ingenious (if you enjoy toxicity).
We made these in cub scouts back in the early nineteen-sixties.
They work well in a hobo stove made from a number ten steel coffee can. To make a hobo stove, simply punch four holes in the sides of the can around the bottom and six to ten holes in the sides around the top. The Venturi effect draws air to feed the flame in through the smaller openings and out the top, focusing the heat at the top of the stove.
You can use either the open or closed end for the top of the stove; the closed end on top will give you a hot cooking surface that you can cook on while your tuna can, wax & cardboard fuel source is placed on the ground or on a flat rock and the closed end at the bottom will allow to gook directly over the flame. A wire coat hanger can easily be made into a grate for your food or for supporting cookware.
Our troops in the mid-60’s made buddy burners similar to the ones found here: https://theresjustonemommy.com/2016/07/31/making-a-buddy-burner-emergency-stove/. We cooked breakfast on them using a buttered piece of foil and cooked french toast.
I kept a similar one in the car for emergencies, which came in handy when we ran out of gas on Vale Mountain on a cold winter night on our way from Iowa to L.A. for Christmas. My husband had laughed at me when I packed into the station wagon, but it kept my family of 6 warm and we made hot chocolate, instant oatmeal and other things. I did punch two holes for a handle made from coat hanger, also added wire to the lid of the tuna can to adjust the flame. I had the entire set up on a pie tin on a metal tray on a flat surface in the van. For most of time we were able to keep warm using an old large candle, then brought out the Buddy Burner tuna can to heat the water for chocolate, oatmeal & soup using an old tin coffee pot and tin mugs I kept in the kit.
I stick a birthday candle in the middle of my buddy burner’s.
Check out a rocket stove from tin cans also great.
Would it not be easier to light this if you just use a length of candle wick? or would that reduce this to just a long burning candle? I guess you could make this into a multi wiched candle to get the hotter burn but shorter life. Like 5 wicks for cooking and 3 for heating. Just an idea.
Just like in Girl Scouts 60 years ago! It is a great way to repurpose materials!
Just as good as anything you can buy on the market!
For a decorative yard light put the “stove” in a much larger decorated pretty can. This, also, protects it from the wind.
Thanks Jenn for the tip on how tall to make the cardboard, as well as how dense to pack it in.