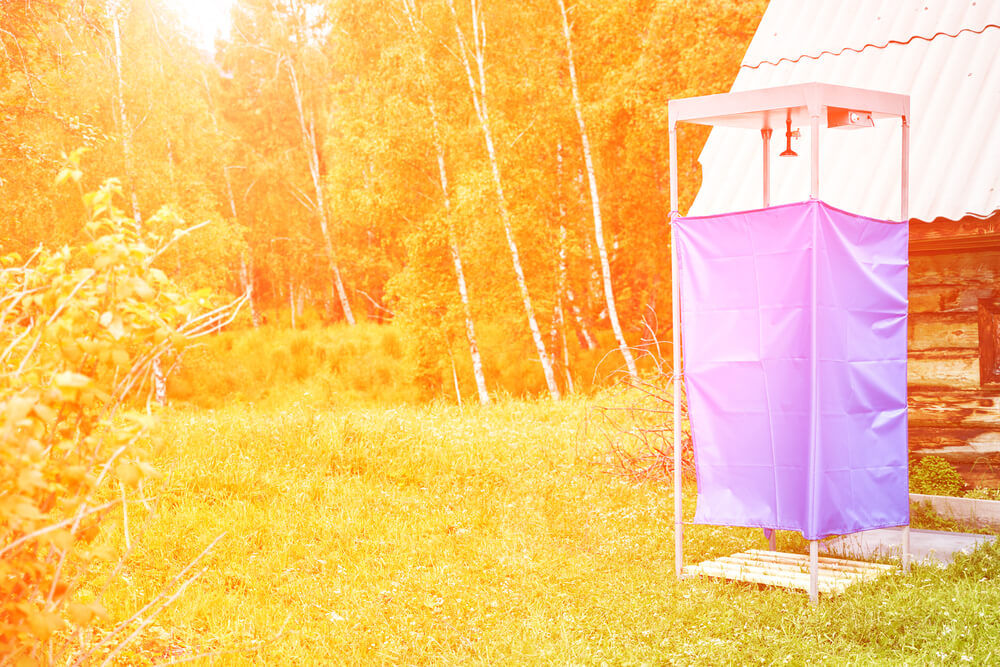
Living off-grid does not mean living unhealthy. Taking a shower from time to time is a necessity, and taking a hot shower in a DIY outdoor shower is a true treat. An off-grid outdoor shower can range from a utilitarian vinyl shower bag hanging in a tree to a bucket shower to a luxurious stone and mortar oasis. The choice is yours.
Exploring the Options
There is no exact way to build an off-grid shower. Your shower can be anything you want it to be. In this article, we will explore some of your options.
- Exploring the Options
- Getting the Basics
- Components Needed To Create Water Pressure
- How to Decide
- Floor
- Walls
- Designing Your Shower
- Height
- Weight
- Other Things to Consider
- DIY Off-Grid Shower For Cold Climates
- Four Cold Climate DIY Shower Configurations
- A Word About Shower Drain Lines
- Last Words
We will start with the fundamental elements of an off-grid shower and then imagine what your outdoor shower could be.
Getting the Basics
An outdoor shower must have certain features. These features are standard and expected in a typical home. In an off-grid home, these items can be a challenge.
A shower, by definition, requires flowing water, which requires energy. The oldest way to create flowing water is to use gravity. Or, the modern way to induce water to flow is with a pump.
Whether or not your off-grid shower has hot water is up to you. A hot shower will require some sort of water heater but might be the right choice if cold showers aren’t for you.
Components Needed To Create Water Pressure
Storage Vessel
A water tank, water barrel, bucket, trough, or bag can be a water storage device. Whatever you choose to use, it must be able to be filled with water, covered to keep the water clean, and attached to the plumbing.
The storage container does not need to be very large. Two gallons is all you need to take a shower.
Plumbing
You can install a rigid pipe or a hose to carry the water from the storage container to the shower. You will need to install a fitting to connect the vessel to your plumbing.
Using 1/2 inch rigid pipe is more permanent. A hose is more straightforward. You will need a valve to start and stop the water flow. The valve you use will be dependent on the plumbing layout.
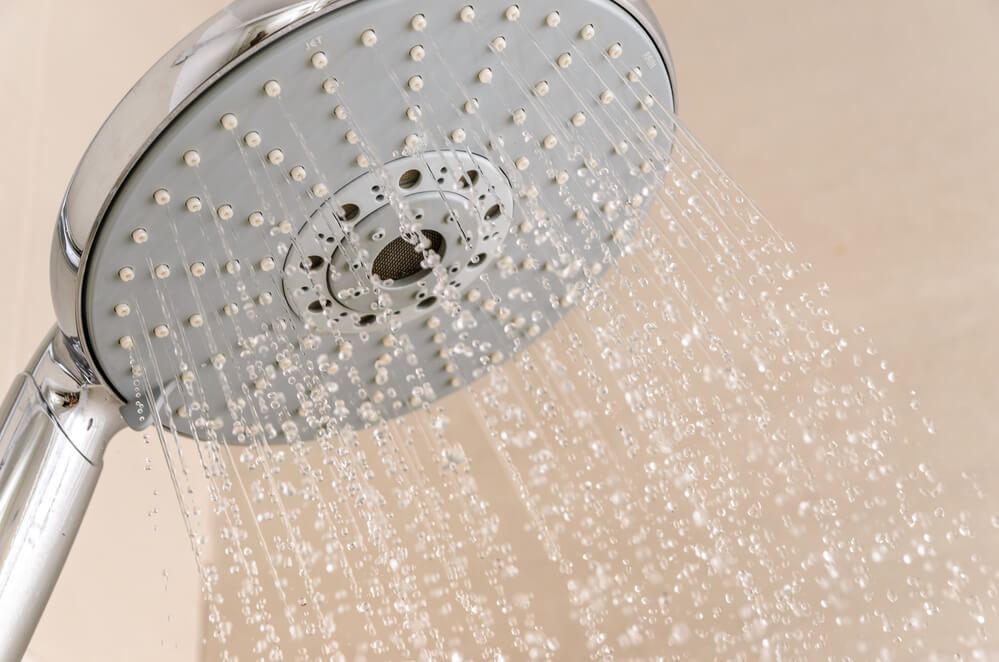
The showerhead used will be dependent on the plumbing layout as well. You will be able to use a manufactured showerhead or make your own.
For a Gravity Feed Shower
Achieving the elevation required to create water pressure is the most challenging part of the gravity feed shower. The water storage vessel must be above the level of the showerhead. The higher the vessel is, the more water pressure is created.
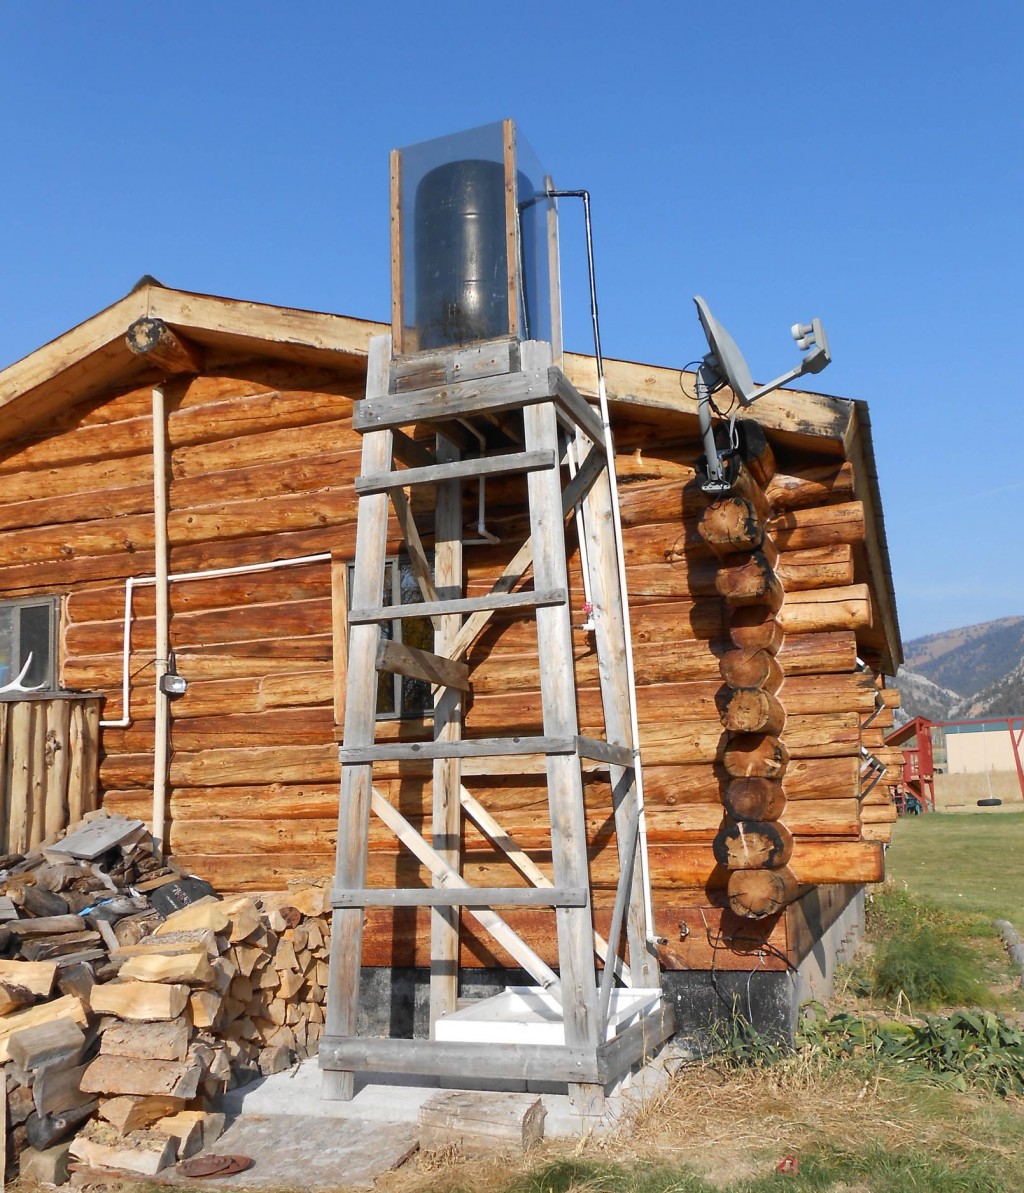
It only takes a few pounds of pressure to make a soothing shower spray. If you do not mind sitting while you bathe, the vessel can be as little as 6 or 8 feet off the ground.
For a Pump Powered Shower
Using a pump is an easy and convenient way to power your shower. An electric pump eliminates the need for elevation to create pressure. A pump will still require a water supply and some plumbing.
You will need to include an electrical supply or solar power if you choose to use a pump. A medium-sized solar panel can power a small 12-volt water pump, supplying a solar-powered shower. If desired, you can use a 12-volt battery to provide power for night showering.
How to Decide
The choice between gravity or pump takes some consideration. There are pros and cons to each option. Gravity takes more physical labor. Pumps require electrical components. Here are some factors to consider.
Gravity Feed PROS:
- Gravity is free.
- Gravity is always on.
- It does not require electricity.
Gravity Feed CONS:
- Water must be elevated to create water pressure.
- Water weighs approximately 8 pounds per gallon.
- The flow will vary with the water level in the vessel.
Electric Pump PROS:
- Using a pump does not require elevating the water vessel.
- Consistent pressure.
Electric Pump CONS:
- A pump requires an electrical supply.
- Solar only works during daylight hours.
- A battery is required for cloudy days or at night.
- More equipment to maintain.
- Added expense.
Floor
A solid or elevated surface is essential to provide drainage and avoid a muddy mess. A shower floor must be sturdy and slip-resistant. A material with some texture is preferable. A comfortable shower area should be at least 2 feet by 2 feet.
Elevated Drain Through Floor Materials
- Wood Slats.
- Plastic Decking
- Steel Floor Grate.
- Plastic Floor Grate
Elevate the floor structure a few inches off the ground. Dig a shallow trough under the floor to collect the water. A shallow ditch will drain the water away from the shower area.
Safety note: Do not use pressure-treated wood for the standing surface. The chemicals in pressure-treated wood can be toxic.
Solid Surface Floor Materials
- Concrete Pavers.
- Concrete Blocks.
- Concrete Slab.
- Tile on a sand bed.
If the floor is a solid surface, there should be a slight pitch to avoid puddling. A slope of 1/4 inch per foot of floor is adequate.
Walls
The first instinct when building an off-grid shower is to go without walls, but modesty will demand privacy.
Walls also provide some protection from the wind. Even a slight breeze will chill you to the bone when you are wet all over. You can build a simple stall with a wide variety of materials.
Shower Stall Frame Materials:
- Lumber.
- Light gauge steel pipe.
- Schedule 40 PVC or ABS pipes. (Do not use thin-walled PVC pipe.)
When designing your shower stall, consider the weight it will need to support. If you plan to use the stall to hold your elevated water vessel, the stall will need to support that weight in addition to the weight of the wall panels. This arrangement will limit the size of the water vessel.
Shower Stall Wall Panel Materials:
A wall panel can be any material to provide some privacy and break the wind. Lightweight materials are preferable. It makes for easier construction and requires a less substantial support structure.
A door is another consideration. A simple set of hinges and a latch are all that is required to provide a door.
Wall Panel Materials
- Plastic tarp.
- Corrugated steel or fiberglass panels.
- Wood fence pickets.
- Plywood.
Designing Your Shower
Elevated Drain-Through Floor
The frame of the flooring material should be waterproof. Plastic, concrete, or pressure-treated wood are appropriate materials. Use rust-resistant fasteners to avoid rust.
A secure, sturdy frame is a necessity to achieve a safe floor. When your structure is finished, attach your decking surface.
Solid Surface Floor
It is best to first build a form around the perimeter of the new floor. Be sure the form is straight and square. Be sure to include a slight pitch to provide drainage.
Once the form is in place, fill it with the chosen materials. Evenly filling the form will create a sturdy floor with adequate drainage.
Height
The height of your shower must allow the tallest person using it to move without hitting their head. For a stand-up shower, 8 feet is the norm. Extra room is required if you plan to use a rain shower style head.
A sit-down shower needs to be over 6 feet tall. You need to stand up to get in and out.
Weight
Wood, steel, and plastic tubing will support the wall panels and a simple roof. You should use a 3-inch or 4-inch diameter pipe if using PVC or ABS.
If you plan to use the structure to elevate your water vessel, the structure will need to support that extra weight. A 5-gallon jug of water weighs approximately 40 pounds. A lumber or steel frame will easily support that weight.
If using PVC or ABS, the shower frame will probably not support the weight of a water vessel. Test the structure before placing the vessel and filling it with water.
Wall Panels and Door
Once your frame is in place, wall panels and the door can be attached directly to the frame with appropriate fasteners. Even PVC and ABS pipes will hold a coarse thread screw. Use galvanized or coated decking screws if possible to avoid rust.
Be careful not to over-tighten screws in any material. If you are using metal or fiberglass, be cautious of sharp edges. File, sand, or cover sharp edges to avoid injuries.
Plumbing
Many plumbing components and configurations can be used in off-grid showers. The decisions you have made to this point, and the components available, will impact the installation of an off-grid shower. Here are some considerations to keep in mind while plumbing your shower.
Overhead Storage Vessel
The overhead vessel is the most uncomplicated design and requires the fewest components. Be sure to pre-drill and install the plumbing attachment before placing the vessel. Install the valve and shower head after the vessel is secured.
Remote Storage Vessel
A remote water storage facility makes building the shower stall a little easier. On the other hand, it demands more plumbing. Route the pipe or hose from the vessel to the shower in as direct a path as possible. Avoid elevation changes along the route.
Every extra foot of length and elevation will diminish the flow rate. It would be best to bury the pipe or hose to protect it from damage.
Pumped Water Supply
A pump will allow you to place the water vessel next to the shower. You can use a solar panel as the shower stall roof. Take care to keep electrical connections and battery (if used) away from the water vessel and shower spray.
Plumb the connections from the vessel to the pump and from the pump to the shower valve and head.
Other Things to Consider
This discussion covers the basics of building an off-grid shower. There are other options for you to consider when installing an outdoor shower.
Black Water Vessel = Black will absorb solar energy and heat your water.
Water Heater = A point-of-use propane water heater can heat your shower water (no more cold water!).
Water Pump = If you initially chose gravity feed, you can add a pump later.
DIY Off-Grid Shower For Cold Climates
Living in a cold climate can make life difficult. If you live in an area where the temperature drops below freezing, you know how frustrating it can be. Pipes freeze and break, well pumps freeze up, and anything involving water becomes a challenge.
But even in a cold climate, a shower can be a reality. It just takes a little creativity and some effort.
There are a few ways to create a shower that can cope with freezing temperatures. They do require a little more planning and effort. A shower can be as simple as a bucket, a ladder, and a trough to catch the water. Other styles will require a heat source.
As with any off-grid project, the only limits are the materials you have to work with and the amount of effort you can put into it.
Four Cold Climate DIY Shower Configurations
Four Shower Options
- Temporary indoor shower
- Permanent indoor shower
- Semi-detached shower
- Free-standing shower
These designs are for a water capacity of approximately two gallons. A larger capacity is always an option if you have available water and can move it around.
These showers are for homes with no plumbing. Water will be heated on a stove or water heater and transported to the shower.
Each shower style has multiple options. Improvements can be added as you see fit. In most cases, these designs can evolve as experience and demands change.
Temporary Indoor Shower
The simplest method of showering requires very little room and very few components. If your off-grid getaway is a one-room cabin, this may be your option. It will work in a cabin with no crawl space for wastewater plumbing.
It provides no privacy, however, so it is best suited for those who live alone or with a very good friend.
The Components
- A galvanized steel, aluminum, or plastic tub or stock tank big enough to sit in is the basis of the temporary shower
- A tub that must be narrow enough to pass through your cabin door; two-foot wide tubs are very common at tackle and feed shops
- A water vessel
- Any water container that you can hang and attach a hose to will work; some common choices are a camp shower bag with a hose and sprayer included or a five-gallon plastic bucket
- A garden watering can will work if you have a helper to assist you
Note: If you are using a bucket, a 1/2″ barbed fitting should be installed on the side of the bucket. Place the fitting as close to the bottom of the bucket as possible. A length of 1/2″ vinyl tubing or garden hose will be attached to the barbed fitting. A 1/2″ plastic ball valve will be attached to the end of the hose to control the water flow. A small sprayer can be attached if desired.
If you have nowhere to hang a shower bag or bucket, a sturdy 6-foot “A-frame” ladder will work. Use a small wood or plastic stool.
Set Up
First, place the tank wherever you plan to shower. If using a camp shower bag or bucket, find a safe place to install an anchor screw at least six feet off the floor. If using a ladder, arrange it as close to the end of the tank as possible.
Then, use a length of chain or rope to suspend the water vessel as high as possible. Place the stool in the tub and under the water vessel.
Using The Temporary Shower
Set up your components while your water is heating. When the water is warm, transfer it to your shower vessel. When you are in the tub, get wet. Be careful to use less than half of your water—soap up. Rinse off with the rest of the water.
The pressure from the hose should not cause much over-spray or splatter around the tub. A rag or mop will be able to clean it up.
Drag or carry the tub outside and dump the water wherever you see fit when you are finished. It will only have a few gallons of water, so it should not weigh very much.
The tub can stay outside until the next time you need it.
Temporary Shower Options
Add a curtain for privacy.
A pump can replace the hanging bag or bucket if electricity is available. Low flow pumps that operate on either 12 volt DC or 120 volt AC are available for reasonable prices. Be sure the pump will handle water up to 100 degrees Fahrenheit.
The tub can be mounted on a cart with wheels to be wheeled rather than carried.
Permanent Indoor Shower
This shower is generally the same as the temporary version. If your cabin has available space and a way to drain water from the tub, the shower can remain in place when it is not in use.
You can use a plastic shower pan for a permanent shower installation. However, most people prefer the novelty and appearance of the stock tank.
Drain Requirements?
Adding a drain requires space under the shower floor. Route the drain out from under the house. A drain line requires a drop of just a few inches from the tub floor to the drain pipe’s discharge point.
If The Cabin Has a Crawlspace
A drain line can pass through the floor and outdoors. A drain line only needs approximately one-half of an inch drop per foot of run to drain water. A crawlspace will provide plenty of space for a drain line
If The Cabin Does Not Have a Crawlspace
If you have sufficient headroom, elevate the tub four or six inches to provide the space to install a drain line. The line can pass through the elevated area and the wall to the outside.
Components Needed To Create a Drain
You will need a 1 1/2” or 2-inch utility drain assembly, as well as ABS drain pipe and fittings appropriate to attach to the drain assembly and discharge to your selected location.
Use a gooseneck in the drain line if you have space. This will keep odors and insects from coming up your drain line.
Options For a Permanent Installation
- Water-resistant wall panels; galvanized corrugated steel panels are a popular choice
- Water pump
- Shower curtain
- Claw foot tub; heavy, but very stylish
- Propane on demand water heater
Semi-Detached Shower
This shower requires an addition to your cabin. You will need to construct a small shower room, and add a door opening cut to connect it to the main cabin space. The benefit of this plan is that the heat of the main living area will warm the shower space.
The Room Interior
A shower room will not be large. You can use a standard plastic shower pan. Pans are typically 30 inches square or larger. The interior of the addition does not need to be any larger than the shower pan used.
The room can be built with a crawl space for drainage even if the main cabin does not have one. Treat interior walls with a plastic shower stall, galvanized steel sheets, tile, or any waterproof material you prefer.
If you use a hanging water vessel, the room needs to be tall enough for the vessel or large enough for users to sit comfortably.
Room Structure and Exterior
The structure and exterior of the shower room should follow standard building techniques. Insulate the room as much as possible to retain heat. If the cabin has a crawl space, build the shower room floor at the same level.
If the cabin does not have a crawl space, the shower room should be built with at least a 6-inch space under the floor for a drain assembly. The result is a step up to get into the shower.
The Water Supply
Cabin heat will warm the shower room and prevent freezing. The shower can be hard plumbed if the cabin has plumbing. Plumbing can be surface mounted on the interior walls for ease of installation. Use a hanging water vessel if plumbing is not available.
Drainage
Use a standard drain assembly. Plastic shower pans are produced with standard-sized drain holes. A matching drain kit will make assembly straightforward. Drain kits for tile floors come in various standard shapes and sizes. Use a tile drain kit if you decide to use tile or other solid surface flooring material. The drain will pass into the open space under the floor and out of the shower addition
Shower Room Options
- A shower curtain or door
- A point-of-use water heater
- A window for light and ventilation
- A water pump if there is no plumbing system
Free-Standing Bath House
If you want to create the ultimate bathing experience, this is your project. The bathhouse is not a shower. The steam bath is patterned after traditional designs. It does serve the same purpose as a shower.
The house includes a heat source to warm the room and heat the water. The heat source will be a small wood stove. Using the bathhouse requires some effort and prep time, so it may not be appropriate for daily use.
The Structure
A bathhouse needs to be large enough for the occupant and the heating source. Standard construction methods should be followed for the structure. Walls should be well insulated to retain heat.
A door will be required. A window will be required for light. A fresh air source must be incorporated into the structure to provide oxygen for the stove. Install a vent or window to enable heat and moisture to escape after use.
The Floor
A four by eight-foot floor space is ideal for a single or two-person bathhouse. An elevated floor will allow for a drain assembly. The floor structure must be sufficient to support the occupants and the stove. Flooring material can be tile, concrete, or moisture tolerant wood. Bamboo is an excellent but expensive option.
The Heat Source
Place a small wood stove at one end of the bathhouse. The stove must include an appropriate stove pipe. Use a heat-resistant material around the stove. Some safe materials are steel, tile, or tempered glass. Follow standard wood stove installation guidelines.
Bath House Interior
The interior surfaces of the shower house must be mold and mildew-resistant. Tile, cement, steel, plastics, teak wood, cedar, and bamboo are typical materials. Materials must be able to withstand repeated exposure to moisture and steam. A bench can be built into the room to allow users to relax.
Using the Bath House
You will not heat the house at all times. A fire will need to be started in the stove before use. Use a large pot, or pots, to heat water on the stove. This water will create steam and provide hot water for washing. The heating process will take some time.
It will take some experimentation to establish fire-building procedures and water heating times. When the room is warm, and the water is hot, use a large ladle to pour water over yourself. Wash, rinse, and steam as long as the water lasts.
A Word About Shower Drain Lines
Water from off-grid showers is gray water. It can be drained onto the ground. Decorative plants can use shower water with no ill effects. If you do not want the water to drain onto the ground, a wet-sump can be dug to accept the water.
A covered, open bottom sump can easily handle the small amount of water from a shower. The main factor is to keep the water away from the house’s foundation. Excess water in the soil may cause damage to house foundations.
Cover the end of the discharge pipe with wire mesh if the water is draining onto the ground. The mesh will keep small rodents or other wildlife from getting into the drain pipe.
Last Words
Likely, your DIY off-grid shower will not work as planned the first time. There will be a period of improvement and adjustments for any DIY outdoor shower, whether you’re building a solar shower, a portable shower, or even a shower house to match.
In the end, you will have a facility that will serve you and your family for years with little trouble.
Where I live this would not work for several months of the year as it gets too cold, below freezing most of the time. Mid spring to mid fall would be fine though. Any ideas for in the cold months for those of who live in the colder climates?
We’ll give this some thought, because there’s a few different paths someone could take. We’ll do a little research and put an update together next week. Thanks for the great comment!
Hey Alan,
We updated some ideas if you’re trying to build an off-grid shower in colder climates. Hope it helps! Happy to see if anyone else has additional suggestions we can add on to this.